
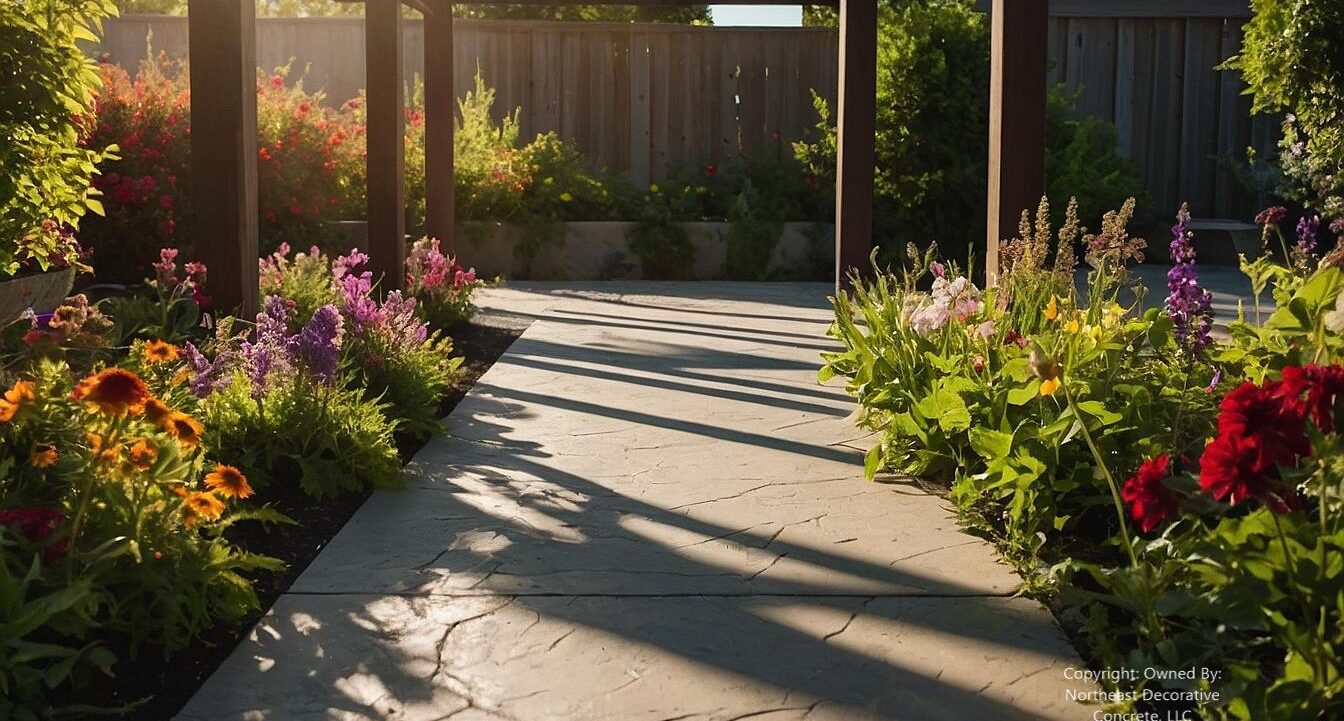

How to Phase Your Stamped Concrete Project on a Budget
Stamped concrete brings beauty and strength to outdoor areas. But expenses can rise fast. New Hampshire and Massachusetts homeowners can phase their projects. This way, they spread costs and still get a high-end look. This guide shows you how to plan, design, and carry out a stamped concrete project. You can do it in affordable steps—without cutting corners.
Why Phase Your Stamped Concrete Project?
A family wanted a stamped concrete patio and walkway. But they couldn’t afford the $15,000 upfront cost. So, they split the project into three phases: patio first, walkway next, and driveway last. This approach saved 30% and allowed them to finish in two years.
Phasing lets you:
-
Manage cash flow without loans or credit cards.
-
Test designs on smaller areas before committing to more significant sections.
-
Adapt to weather delays that are common in NH’s unpredictable climate.

3 Proper Steps: Plan Your Phased Project
Phase 1: Start Small
Begin with high-impact areas like patios or walkways. Smaller sections (under 300 sq. ft.) cost less and allow you to practice stamping techniques.
Pro Tip: Use a single pattern and color in Phase 1 to reduce labor and material costs. Popular choices include Ashlar Slate or Cobblestone.
Phase 2: Expand Gradually
Once Phase 1 is complete, adjacent areas like fire pits or steps should be added. Reuse forms and tools to save money.
Phase 3: Tackle Large Areas
Finish with driveways or pool decks. By now, you’ll have the experience to handle complex layouts.
Avoid Mistakes when Phasing a Stamped Concrete Project
Planning a stamped concrete installation project in New Hampshire requires careful thought. You have to balance your budget with durability for the long term. Here are key mistakes to avoid at each stage. These tips come from industry knowledge and real-world examples.
Mistake 1: Skipping Proper Base Preparation
Why It Matters: Poor ground compaction or unstable soil can lead to cracks and uneven settling, especially during New Hampshire’s freeze-thaw cycles.
How to Avoid:
-
Excavate to undisturbed soil (minimum 12″ depth).
-
Compact dense graded aggregate in 4″ layers.
-
Reinforce with wire mesh or rebar for driveways or high-traffic areas.
A homeowner in Manchester, NH, saved $4,000 using an overlay to fix a cracked patio. However, they later experienced sinking because the base wasn’t prepared properly. Complete reinstallation cost $6,500.
Mistake 2: Ignoring Weather Conditions
Why It Matters: NH’s humidity, rain, and temperature swings disrupt curing times. Pouring on frozen ground causes a 50% strength loss.
How to Avoid:
| Condition | Action |
|---|---|
| Winter | Use heaters to thaw ground; pour only if temps stay above 40°F for 5+ days. |
| Summer | Work early in the morning; use curing blankets to slow drying. |
| Rain | Cover fresh concrete with tarps for 12–16 hours. |
Pro Tip: Air-entrained concrete mixes handle NH winters better.
Mistake 3: Rushing the Stamping Process
Why It Matters: Stamping too early causes concrete to sink, and stamping too late makes patterns blurry. Both mistakes waste materials.
How to Avoid:
-
Test concrete firmness: Press a thumb—it should leave a 1/4″ dent.
-
Use alignment guides for complex patterns like Ashlar slate.
-
Apply the release agent sparingly to prevent color blotching.
A contractor in Nashua lost $3,000. He had to redo a patio because the 90°F heat made the concrete cure too quickly, causing the patterns to misalign.
Mistake 4: Poor Sealing Practices
Why It Matters: Unsealed concrete fades and cracks within 3–5 New Hampshire winters.
How to Avoid:
-
Use acrylic sealers with non-slip additives.
-
Apply two coats: first, within 30 days of curing; second, 12 months later.
-
Avoid sealing in direct sunlight to prevent cloudy residue.
Cost Saver: DIY sealing cuts costs by 60% compared to professional services.
Mistake 5: Neglecting Expansion Joints
Why It Matters: Regular concrete expands and contracts with temperature, causing random surface cracks without new patio joints.
How to Avoid:
-
Cut joints to 1/4 of the slab’s depth.
-
Space joints 10–15 ft apart for NH climates.
-
Align joints with stamp concrete surface patterns (e.g., along “grout lines” in Cobblestone designs).
Mistake 6: Inconsistent Phasing Workflows
Why It Matters: Mismatched colors or patterns between phases create a patchy look.
How to Avoid:
-
Use the same concrete mix and color batch for all phases.
-
Document release agent ratios and stamp pressure.
-
Store leftover stamps and tools properly to avoid warping.
Pro Tip: Plan driveway projects for spring or fall. This helps you avoid the summer heat and winter freezes.
Mistake 7: Underestimating Maintenance
Why It Matters: Salt and snowplows damage unmaintained surfaces.
Maintenance Checklist:
-
Annual Cleaning: Pressure wash with pH-neutral detergent.
-
Reseal Every 3–5 Years: Focus on high-traffic areas.
-
Crack Repair: Fill hairline cracks with concrete caulk before sealing.
Key Takeaway
“Phasing lets you spread costs, but shortcuts in prep or sealing will cost double later.” – Northeast Decorative Concrete, NH
Avoid these seven mistakes. They’ll help add value to each stamped concrete project phase. You’ll also avoid hidden costs. Use weather-ready materials, careful stamping, and regular spring maintenance. This will help your finish last for decades.

Budget-Friendly Concrete Contractor Design Choices
| Design Option | Cost per Sq. Ft. | Best For |
|---|---|---|
| Single-color stamped concrete | $10–$20 | Patios, walkways |
| Two-tone with border | $18–$24 | Driveways, pool decks |
| Overlay on existing concrete | $12–$14 | Repairing old slabs |
A Raymond, NH, homeowner saved $4,000 by applying a concrete overlay to their cracked patio. They chose this price option instead of a full tear-out. The overlay was stamped with a Random Stone pattern and sealed for durability.
Cost-Saving Stamped Concrete Patio Tips for NH Climates
-
Pour in Spring or Fall Cooler temperatures (50–70°F) slow concrete curing, giving you more time to stamp. Avoid summer heatwaves that cause rapid drying.
-
Use local suppliers in NH, like White Cap Supply and Walt Tools. They offer discounts on bulk orders for concrete mixes and stamps.
-
Limit Custom Stamps Custom logos or intricate designs add $3–$5 per sq. ft. Stick to standard patterns unless it’s a focal point.
-
DIY Sealing: Buy sealer in bulk and apply it yourself. A 5-gallon bucket covers 1,000 sq. ft. and costs $300 (vs. $500 for professional sealing).
-
Use Cheap Landscaping: incorporate budget friendly strategies to enhance the appearance
Phased Project Cost Comparison
| Project Scope | Full Cost | Phased Cost (3 Years) | Savings |
|---|---|---|---|
| 500 sq. ft. patio + walkway | $12,000 | $9,500 | 21% |
| 1,200 sq. ft. driveway | $18,000 | $14,000 | 22% |
Execute Each Decorative Concrete Phase Like a Pro
Pouring and Stamping
-
Mix concrete to a “gritty” consistency for better stamp adhesion.
-
Stamp within 90 minutes of pouring—NH’s humidity can speed up curing.
-
Apply a release agent to avoid stamp sticking.
Common Mistake: Rushing stamp alignment causes uneven patterns. Always do a test stamp on a hidden section. Always wait for the proper time to wash the release agent off.
Curing and Sealing
-
Cure for 7 days before sealing. Use plastic sheeting to retain moisture.
-
Choose acrylic sealers for NH winters—they resist salt and freeze-thaw damage.
Real-Life Phased Project: Dunbarton, NH Homeowner
Challenge: A $25,000 backyard overhaul was too costly upfront.
Solution:
-
Year 1: Installed a 300 sq. ft. patio with Brickform stamps ($4,500).
-
Year 2: Added a curved walkway using leftover materials ($2,200).
-
Year 3: Built a fire pit area with accent colors ($3,800).
Result: Total cost: $10,500 (58% savings) with no debt.
DIY Stamped Concrete Paver Tips from NH Contractors
-
Buy Reusable Forms: Steel or plastic forms that last 10+ years. Rent from Home Depot if needed.
-
Repair Cracks Early Use concrete caulk in Year 1 to prevent costly fixes later.
-
Time Purchases Buy stamps and sealers during NH’s winter off-season for 15–20% discounts.
DIY concrete stamping is not an easy task for most beginners!
Final Thoughts
Phasing your New Hampshire-stamped concrete hardscapes project can save money. It also reduces stress and helps you improve your skills. Start small, focus on high-traffic areas, and reinvest savings into future phases. Even a tight budget can yield stunning, long-lasting results with thoughtful planning.
“The secret to affordable stamped concrete? Break it down, reuse materials, and never rush the stamping installer process.”
Follow these steps to change your outdoor space bit by bit, all while keeping to your NH budget.
Frequently Asked Questions:
Q: What PSI concrete mix is optimal for phased NH projects with freeze-thaw cycles?
Answer:
To withstand NH’s freeze-thaw cycles, use 4,000–4,500 PSI air-entrained concrete with a 6% air content. Air-entrained concrete has tiny bubbles that lower internal pressure caused by freezing water. For phased projects, order all batches from the same supplier. This keeps the installer’s pours consistent.
Pro Tip: Add integral color to the concrete while batching. This method ensures even colors throughout all phases, not just on the surface.
Q: To prevent cracking, how do you calculate joint spacing for phased slabs?
Answer:
Cut control joints at intervals 1.5 times the stamped slab thickness (e.g., 6″ spacing for a 4″ thick patio). To create a consistent appearance, align joints using natural stone hardscaping stamp patterns, such as faux grout lines in cobblestone designs.
| Slab Thickness | Max Joint Spacing |
|---|---|
| 4″ | 6 ft |
| 6″ | 9 ft |
Pro Tip: Use early-entry saws to cut joints 1–4 hours after stamping to avoid raveling edges.
Q: What vapor barrier specifications prevent moisture damage in phased driveways?
Answer:
Install a 10-mil polyethylene vapor barrier under outdoor living space concrete slabs to block ground moisture. Overlap seams by 6″ and seal with waterproof tape. For NH’s clay-heavy soils, add a 4″ crushed stone base (3/4″ aggregate) to improve drainage.
Pro Tip: Skip vapor barriers for exterior slabs in well-drained sandy soils to save $0.50 per square foot.
Q: How do you time pours across phases to match color batches?
Answer:
-
Order 10–15% extra concrete per phase to retain leftover material for color matching.
-
Store unused stamps in climate-controlled spaces (50–70°F) to prevent warping.
-
Document release agent ratios (e.g., 1 lb/100 sq. ft.) and stamp pressure for consistency.
Case Study: A poured concrete stain contractor in Merrimack, NH, saved $1,200. They used leftover Slate Gray integral color from a Phase 1 patio. This was to stamp a Phase 2 walkway.
Q: What reinforcement methods maximize cost efficiency in phased projects?
Answer:
| Method | Cost/Sq. Ft | Use Case |
|---|---|---|
| Fiber mesh | +$0.25 | Residential patios |
| Rebar grid (12″ OC) | +$1.50 | Driveways > 20 ft |
| High-strength synthetic fibers | +$0.40 | Pool decks |
Key: Prioritize welded wire mesh (6×6 W1.4xW1.4) for heavy phases (e.g., stamped concrete driveways). Avoid over-reinforcing small patios to stay budget-friendly.
Pro Tip: Reuse forms from Phase 1 (e.g., steel edging) for later phases to cut material costs by 15%.
Our Locations:
Nashua, NH
North Hampton, NH
Concord, NH