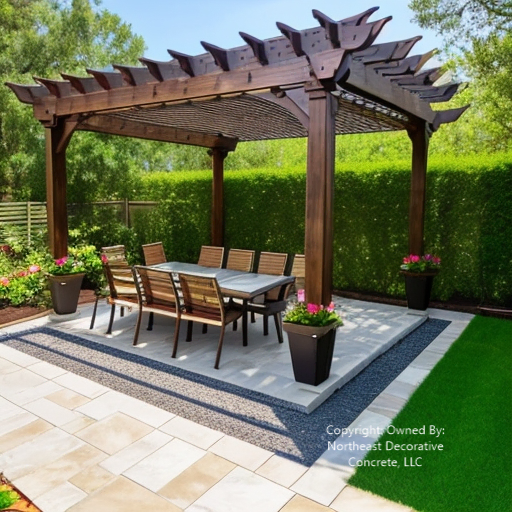
Why Is Stamping Concrete Patios Difficult For Beginners?
Creating a stamped patio might seem challenging if you’re new to working with stamped concrete. After all, you’re taking wet concrete and pressing heavy molds into it to make a pattern. But with the correct info and a plan, even total newbies can get it done!
When I first learned about using stamping concrete, I wanted to try it in my backyard. But everyone said it can get messy for beginners. Now that I’ve successfully made over my dull old patio with a sweet faux natural stone look, I want to share my story. I want other DIYers to feel confident.
I’ve seen many DIYers struggle when they try their first stamped concrete patio or driveway project. Beginners often need to pay more attention to critical factors. These include proper mix consistency, imprint depth, and timing the stamps within the short working window. They also include achieving full-release powder coverage. Attention to small details makes a big difference. Start with something small, like a garden path. Use it to practice the stamped concrete technique. Then, tackle an entire patio.
The key is being patient and doing test samples. Feel free to consult a professional concrete contractor. They can give guidance on the specific techniques for stamped concrete. It ultimately comes down to experience developing an intuitive feel for the medium. Once you get the hang of it, you’ll be hooked and want to stamp everything in sight!
It’s All About Timing When You Stamp Wet Concrete

Beginners often need help with the timing of concrete slab stamping. You only have 1-2 hours max after the concrete is poured to stamp. It starts setting up any later and gets too firm to imprint. They were rushing, leads to sloppy mistakes, too.
My neighbor Phil told me about when he helped a buddy stamp concrete. They were making an outdoor, natural stone paver kitchen. They mixed up the concrete and started prepping the tools and stamps. But then Phil’s friend got a work call and left him alone for 30 minutes. When he returned, the concrete was too hard for the stamps to make a sharp impression.
Picking Out Your Stamp Concrete Designs and Tools
Another area that can overwhelm first-timers is picking out stamp tools and patterns. From cobblestones to bricks and slate, there’s a ton of options! Renting tools can be pricey if you end up with stuff you don’t like or can’t work with.
My advice? Grab some material sample boards from the concrete supply store. Study how the patterns and textures look so you can envision them in your space. Narrow it down to 2-3 contenders. I loved the look of the irregular flagstone for my patio. I chose long, skinny stamp mats to create that layered stone effect.
Getting the Stamped Concrete Patio Mix to the Right Consistency
I told my brother-in-law Marcus I was doing a DIY install stamped concrete surface patio. He said the most important thing was getting the concrete mix right. Too much water and it will be soupy and hard to imprint.
Marcus recommended adding a plasticizer to the pouring and stamping dye mix. This helps make the concrete more workable, flowing evenly into all the crevices in the stamps. I tweaked the mix consistency during my project until it was just right. Test patches are bright, too, since you can experiment before pouring the whole dye slab.
Applying Color and Release Powder Evenly
Here’s another newbie mistake that’s easy to make. Newbies often need help to apply color hardener and release powder evenly. These materials are crucial for bringing out the depth and dimension in the patterns.
My neighbor John stained his stamped front walkway. He accidentally missed some spots with the release powder. When he pulled up the stamps, the concrete stuck in places. Spraying on more powder and re-stamping fixed it, but it was extra work.
Having a partner helped me get full, consistent coverage. One of us focused on spreading color while the other sprinkled powder. Two sets of eyes are better than one for catching bare patches!

Getting the Right “Bounce” with the Stamps
Finally, beginners often need help making the stamp tools do their job. You have some strength to press them in firmly and a gentle bounce in your step. Too much muscle and you’ll imprint too deep, causing the patterns to blur.
It took me a few tries experimenting with pressure to get it right. I started by lightly laying down the stamps, then pressed more firmly. When I pulled them up, I gave them a little vertical lift to prevent drag marks. These subtle moves took practice, but soon, I had my system dialed.
Be Patient and Ask For Cons Of Stamped Concrete Help If You Need It!
I won’t lie – on concrete stamping day, I questioned if I was cut out for this project. But I took deep breaths when I felt overwhelmed. I also double-checked all my steps. When needed, I recruited my brother to lend a hand. Having him there to walk me through the pros and cons of stamped concrete gave me confidence. His guidance on the tricky parts was beneficial.
Creating my faux flagstone patio wasn’t nearly as scary as I thought. Each step alone was pretty simple. Putting them all together just took concentration and patience. I can’t wait to throw a big BBQ bash to show off my handiwork to the whole neighborhood!
So, if you’re on the fence about tackling a home improvement stamped concrete project, go for it! Start small with something like a garden path to get your feet wet. Use the suitable materials and tools—study techniques. Be bold about asking more experienced folks for pointers. Before you know it, you’ll also be a pro, ready to advise other newbies. Just stay calm under pressure, and you’ve got this!
Our Locations:
Nashua, NH
North Hampton, NH
Concord, NH
