

A Step-by-Step Guide to DIY Sealing Stamped Concrete Patio
So you finally finished that gorgeous new stamped concrete patio, walkway, or driveway. Looks pretty sweet. But there’s one crucial final step before you throw any barbeques or park the cars on your newly placed concrete. You have to clean and re-seal stamped concrete!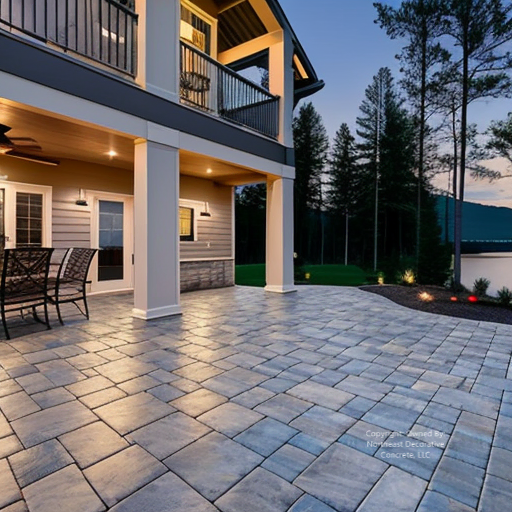
Sealing is vital for protecting decorative concrete and making the colors pop. It also prevents stains, resists water damage, and hides imperfections. This article will teach you everything you need to know to clear-coat stamped concrete. You can do it yourself. I promise it’s easier than you think! Just make sure you apply two coats and use a slip-resistant additive.
Why Clear Coating Stamped Concrete is Non-Negotiable
After hours of hard work stamping and staining, leaving your concrete vulnerable would be a shame. Unsealed concrete soaks up stains like a sponge. It starts flaking apart fast from exposure to the elements.
The sealer forms a waterproof barrier, locking in the color and keeping moisture out. Think of it like rain proofing a jacket or waterproofing boots. The concrete sealer provides a protective shield. Many first-timers don’t coat, thinking they’ll save a few bucks. But you’ll pay big time for repairs and replacement sooner than you’d think. Don’t skip this step!
Timing is Everything
With concrete, patience pays off. Let it cure completely before applying the top clear coating. How long? At least 28 days is best, longer in cool or humid weather.
Test moisture levels with plastic sheeting. Tape down a 2’x2’ plastic square and leave overnight. Lift it. If the concrete’s dark and damp underneath, it’s still curing. You’re good to coat when it’s the same color as surrounding areas.
Apply clear coat concrete stain in dry weather when you do not expect rain for 24 hours. Avoid clear coating to penetrate in direct sun or high winds. Early morning is ideal.
Choosing the Best Concrete Sealer
With loads of sealers, how do you pick the right one? Here’s a simple breakdown of the most common types:
Acrylic Sealers
- Budget-friendly option
- Enhance color well
- Less durable than other sealers
- Need reapplying every 3-5 years
Urethane Sealers
- The most popular concrete sealer
- Offer good protection
- Enhance color and sheen
- Last 2-4 years
Epoxy Sealers
- Super durable and glossy
- Cost more upfront
- Last 4+ years
- Use for high-traffic areas
For stamped concrete, acrylics and urethanes are best. Solvent-based works better than water-based since it won’t whiten or blush.
Are you still trying to figure it out? Ask the hardware store for their recommendation based on your project type.
Proper Prep Work Saves Headaches
You prepped the concrete before stamping it, right? Well, prep work matters before clear coating, too. Clean thoroughly with a pressure washer and let dry fully. Sweep away any puddles or standing water.
Use a concrete degreaser to remove any oily spots from trucks or equipment. Scrub off any leftover release powder from stamping with warm, soapy water.
Check for cracks or low spots that hold water. Fill cracks with caulk or patch low areas. You want the surface to be immaculate and dry before coating it.
Application Tips from a Pro
Clear coating is a simple process, but technique matters! Follow these pro tips:
Use the Proper Equipment
The best way to apply sealer evenly is with a pump sprayer for solvent-based. Use an airless paint applicator for water-based. Avoid cheap garden pump-up applicators – they make a mess.
Roll it Out
Immediately after spraying, back roll the sealer with a long nap roller. This will even the coverage and fill in gaps. This prevents pooling or puddling.
Two Coats is Key
Always apply two coats of sealer. Wait for the first coat to dry completely before adding the second. This ensures full, even coverage.
Cut-in Carefully
First, use a paintbrush to “cut in” along edges, borders, and textured spots. Then, start spraying. This prevents drips and messy overspray.
Mind the Overlap
As you spray, avoid overlap at the edges of each pass to maintain consistent coverage. Overlap roughly 30% with each pass.
Weather Watching
Do not apply in direct sunlight, high heat, or if rain is expected within 24 hours. The sealer can bubble, peel, or get washed away. Be patient and coat when the weather permits.
Rest Easy After Clear Coating
Avoid heavy foot traffic for 24-48 hours after concrete sealing. Let the sealer fully cure before parking vehicles on driveways or furnishing patios. The wait is worth it!
Solving Common Resealing Stamped Concrete Problems
Even seasoned pros mess up sometimes. Here’s how to tackle common top coat problems :
Bubbles or Blushing
Bubbles mean the concrete hadn’t fully cured before clear coating. Blushing is a whitish film from applying water-based sealer in cool, humid weather. Gently scrub problem areas with warm, soapy water. Reapply sealer when conditions improve.
Flaking or Peeling
If the sealer starts peeling up, the surface likely wasn’t cleaned adequately before the clear coat. Pressure wash problem areas to remove the loose sealer, let dry thoroughly, and reapply a fresh coat.
Uneven Sheen
If you apply the sealer unevenly, it will cause some spots to appear glossier. Reapply sealer to low-sheen areas to even the appearance. Adding a second coat overall will also help.
Whitish Residue
A whitish, chalky residue could mean efflorescence. It’s mineral salts rising to the concrete’s surface. Remove it with an efflorescence cleaner before clear coating.
When In Doubt, Call In a Pro!
If your xylene solvent-based problems have you scratching your head, don’t panic! Hire a pro concrete sealer contractor to assess and fix any stamped concrete floor issues. Their experience can save you time, money, and frustration.
Maintaining Your Stamped Concrete Driveway
Clear top coating stamped concrete isn’t a one-and-done thing. Expect to reapply the sealer every 3-5 years, depending on traffic and exposure levels. Here are some maintenance tips for keeping your stamped concrete surface looking fabulous:
Keep it Clean
Prevent the buildup of dirt, leaves, grease marks, etc. With occasional pressure washing. Use a concrete degreaser on oily spots. Scrub dirt marks ASAP before they have a chance to set!
Reseal on Schedule
Mark your calendar to reseal every 3-5 years. Solvent-based sealers last longer than acrylics. When the sheen fades, or the concrete looks dull, it’s time to reseal.
Refresh Worn Areas
High-traffic paths around steps and entryways wear down faster. You don’t necessarily need to reseal the whole area every few years. Spot treat worn sections as required.
Fix Cracks Quickly
Cracks allow water intrusion that can undermine sealer adhesion and lead to discoloration. Fill cracks with caulk or epoxy filler right away to prevent damage.
Consider Sealers with Added Protection
Regular concrete sealers allow discoloration if something splashes and sits for a while. Choose high gloss sealers with added discoloration protection. Use them in accident-prone areas like pool decks.
The Benefits Of Sealing Stamped Concrete Takeaways
I hope this overview takes the mystery out of clear-coating stamped concrete yourself. Your concrete will look fabulous for years with patience and TLC.
The most important thing is don’t skip this step! The only way to protect decorative concrete is with a clear top coating. This coating preserves the color, texture, and structural integrity. Do it right; your concrete will look fresh and vibrant for ages.
Wait for favorable weather and coat it when the concrete is fully cured for best results. Allow proper drying time between gloss coats. Remember to maintain a high-quality, clear coat. Pressure wash and reapply fresh sealer every few years.
Additionally, be mindful of how environmental factors can impact the longevity of your finish. The interplay between stamped concrete sealer and sunlight effects can cause wear over time, necessitating periodic inspections. Take proactive measures to protect your surfaces, ensuring they remain vibrant and intact for years.
It’s pretty simple. And so worth it! That custom-stamped concrete likely set you back some serious bucks. Protect your investment and show it off by maintaining it the right way.
Need more details or run into trouble? Chat with pros at your local concrete supply store or contractors. Don’t be afraid to ask questions. With their guidance, you’ve got this!
Our Locations:
Nashua, NH
North Hampton, NH
Concord, NH